Quickstart
Learn how to use Supabase Queues to add and read messages
This guide is an introduction to interacting with Supabase Queues via the Dashboard and official client library. Check out Queues API Reference for more details on our API.
Concepts#
Supabase Queues is a pull-based Message Queue consisting of three main components: Queues, Messages, and Queue Types.
Pull-Based Queue#
A pull-based Queue is a Message storage and delivery system where consumers actively fetch Messages when they're ready to process them - similar to constantly refreshing a webpage to display the latest updates. Our pull-based Queues process Messages in a First-In-First-Out (FIFO) manner without priority levels.
Message#
A Message in a Queue is a JSON object that is stored until a consumer explicitly processes and removes it, like a task waiting in a to-do list until someone checks and completes it.
Queue types#
Supabase Queues offers three types of Queues:
- Basic Queue: A durable Queue that stores Messages in a logged table.
- Unlogged Queue: A transient Queue that stores Messages in an unlogged table for better performance but may result in loss of Queue Messages.
Create Queues#
To get started, navigate to the Supabase Queues Postgres Module under Integrations in the Dashboard and enable the pgmq extension.
pgmq extension is available in Postgres version 15.6.1.143 or later.
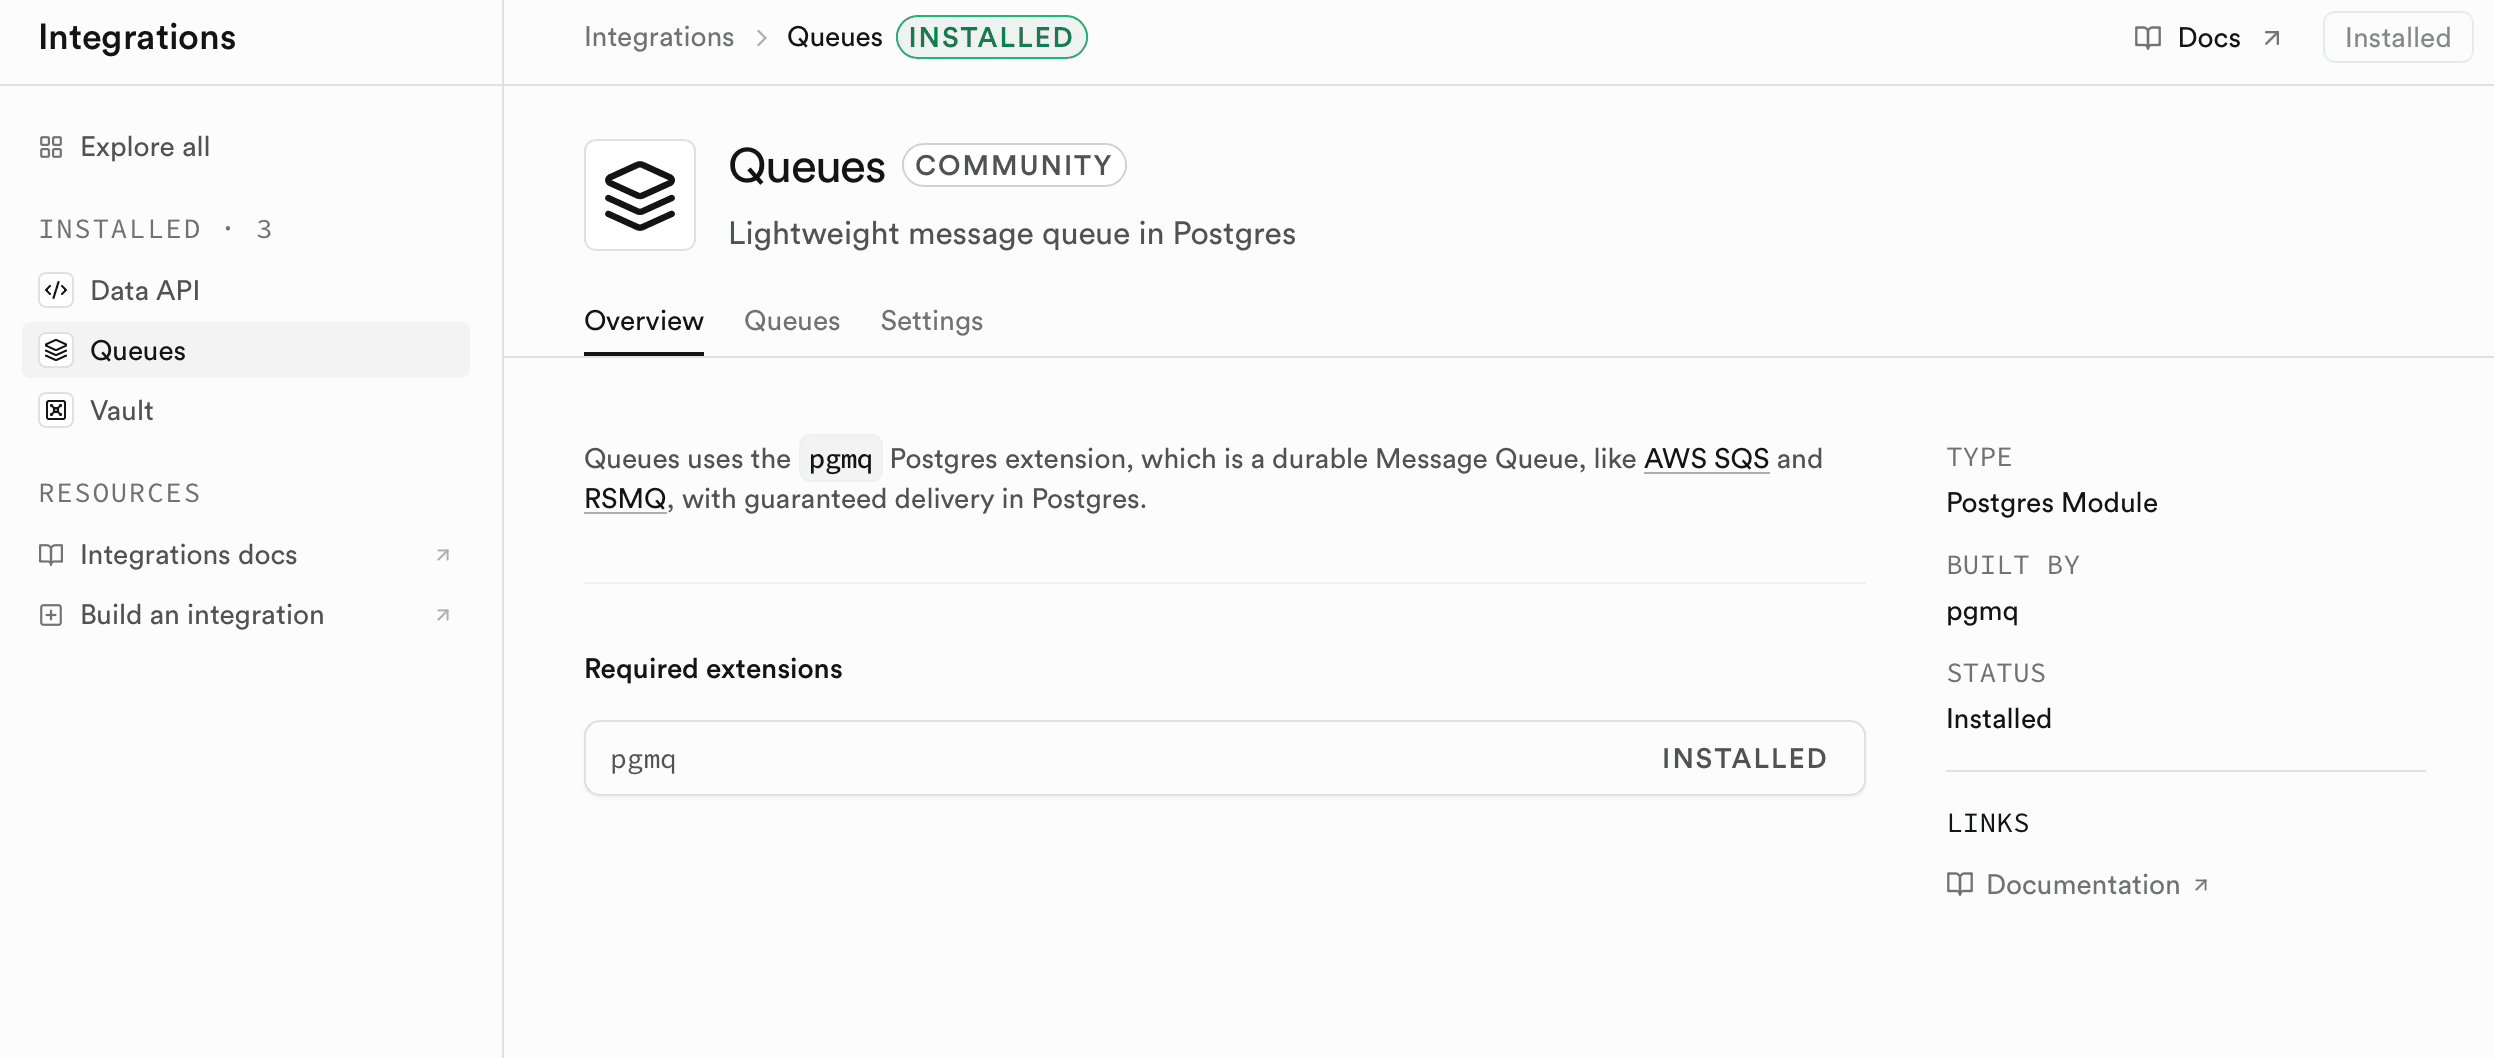
On the Queues page:
-
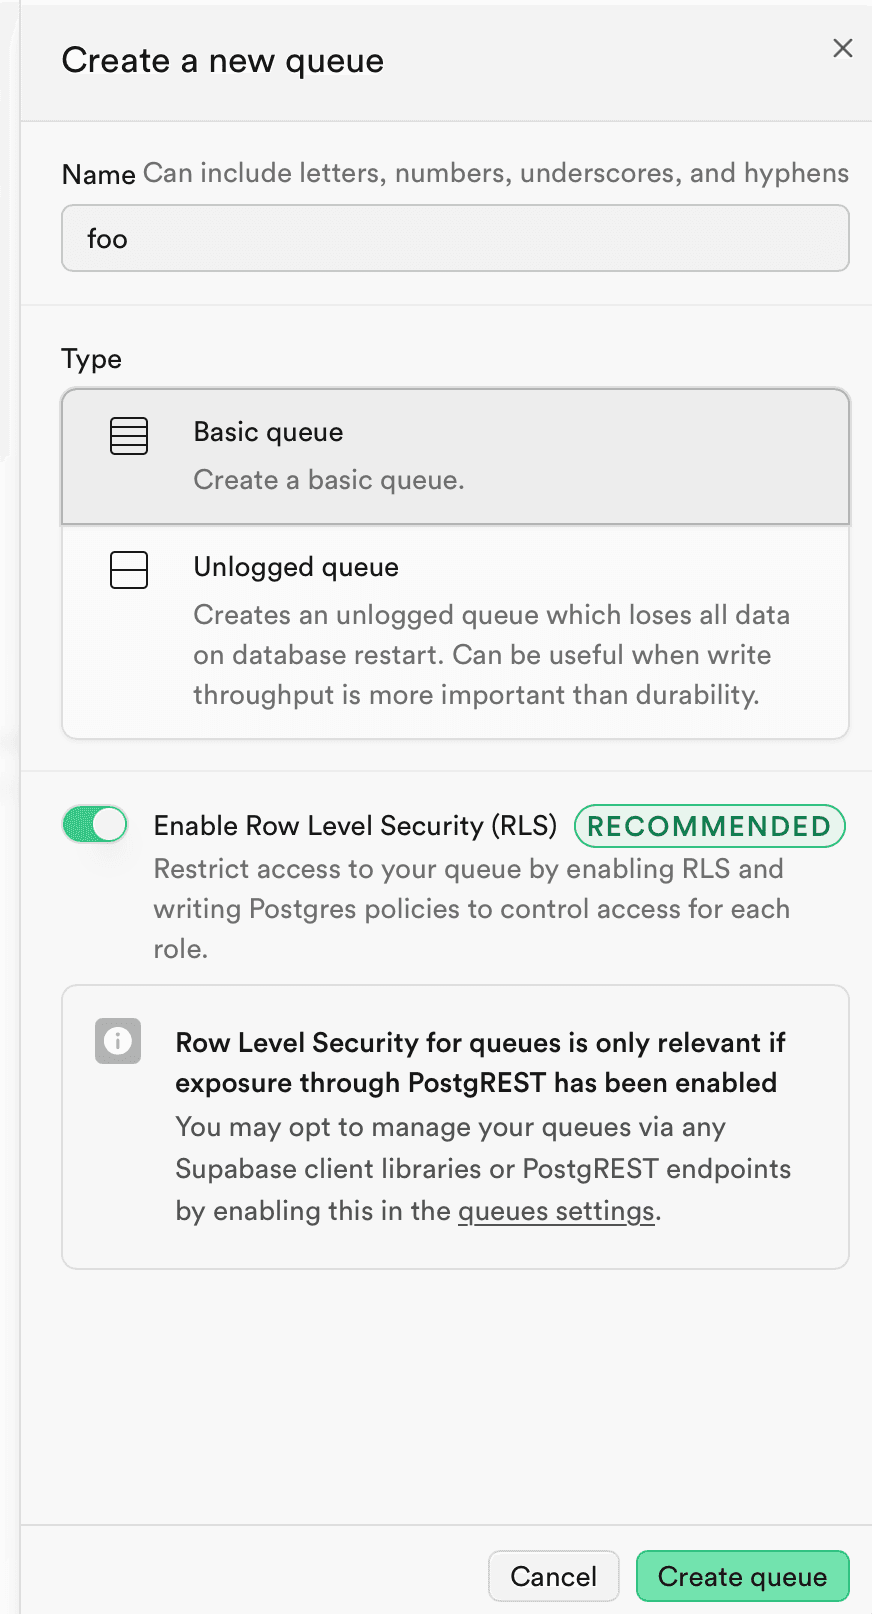
Click Create queue button
-
Name your queue
Queue names can only be lowercase and hyphens and underscores are permitted.
- Select your Queue Type
- We recommend leaving Row Level Security (RLS) enabled. With it enabled, you don't need to set additional RLS on the queue tables.
What happens when you create a queue?
Every new Queue creates two tables in the pgmq schema. These tables are pgmq.q_<queue_name> to store and process active messages and pgmq.a_<queue_name> to store any archived messages.
A "Basic Queue" creates pgmq.q_<queue_name> and pgmq.a_<queue_name> tables as logged tables.
However, an "Unlogged Queue" creates pgmq.q_<queue_name> as an unlogged table for better performance while sacrificing durability. The pgmq.a_<queue_name> table is still created as a logged table so your archived messages remain safe and secure.
Expose Queues to client-side consumers#
Queues, by default, are not exposed over the Supabase Data API and are only accessible via Postgres clients.
However, you may grant client-side consumers access to your Queues by enabling the Supabase Data API and granting permissions to the Queues API, which is a collection of database functions in the pgmq_public schema that wraps the database functions in the pgmq schema.
This is to prevent direct access to the pgmq schema and its tables (RLS is not enabled by default on any tables) and database functions.
To get started, navigate to the Queues > Settings section of the Dashboard and enable Expose Queues via PostgREST. Once enabled, Supabase creates and exposes a pgmq_public schema containing database function wrappers to a subset of pgmq's database functions.
Add an RLS policy on your tables in pgmq#
If you expose your pgmq schema with the Data API, for security purposes, you must enable Row Level Security (RLS) on all Queue tables (all tables in pgmq schema that begin with q_)
Add an RLS policy for any Queues you want your client-side consumers to interact with, by clicking the Add RLS Policy button on the overview page of any Queue in the Dashboard.
Grant permissions to pgmq_public database functions#
On top of enabling RLS and writing RLS policies on the underlying Queue tables, you must grant the correct permissions to the pgmq_public database functions for each Data API role.
The permissions required for each Queue API database function:
| Operations | Permissions Required |
|---|---|
send send_batch | Select Insert |
read pop | Select Update |
archive delete | Select Delete |
To manage your queue permissions, click on the Queue Settings cog button on the overview page of any Queue in the Dashboard.
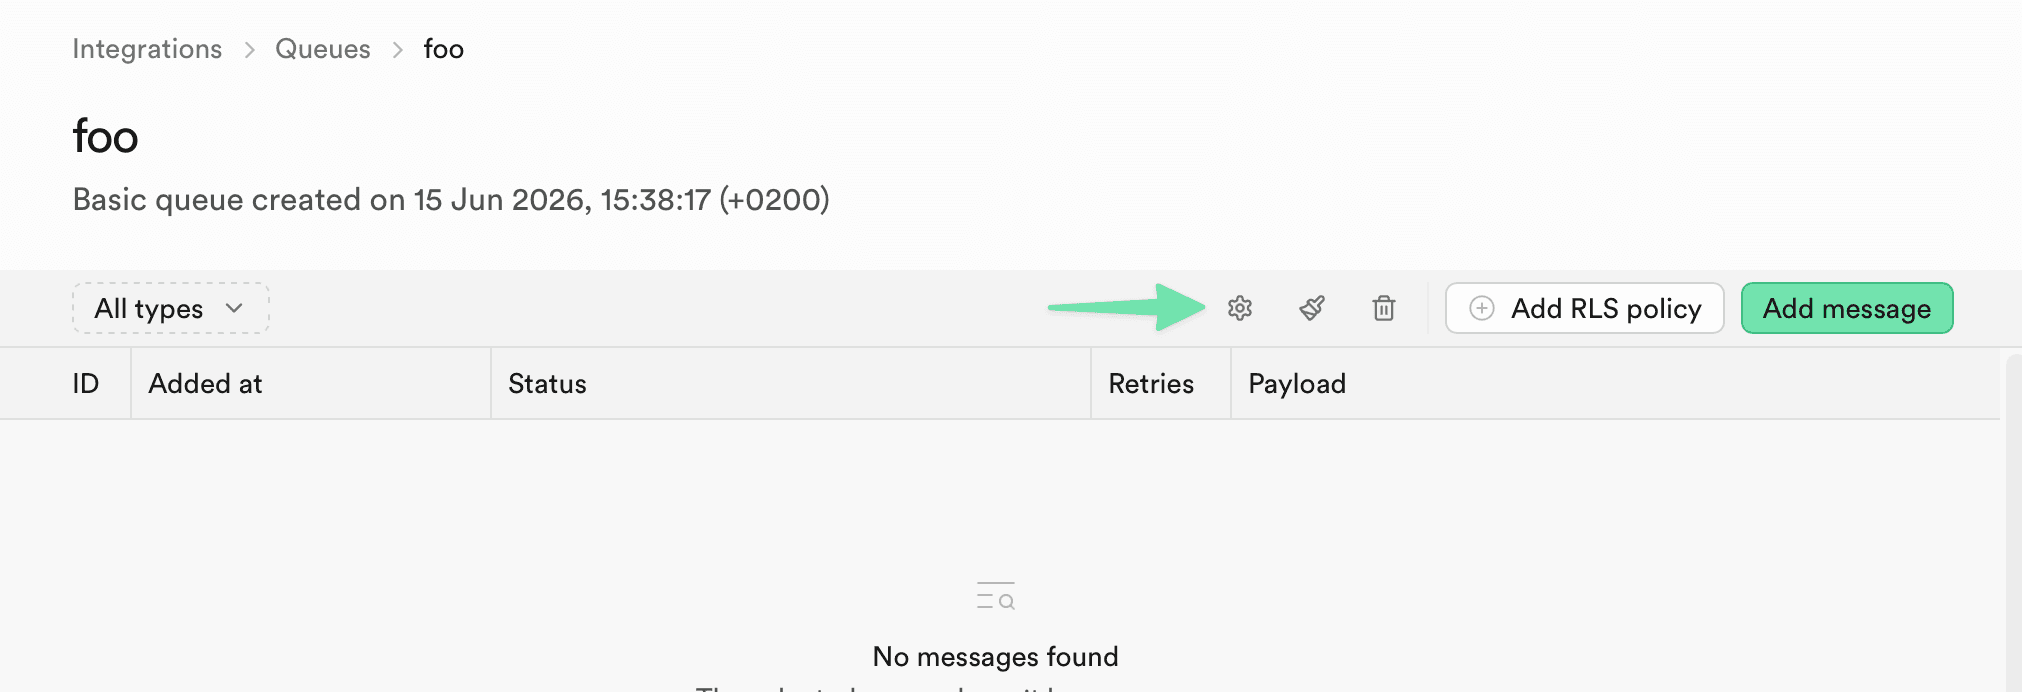
Then enable the required roles permissions.
| ROLE | Select | Insert | Update | Delete |
|---|---|---|---|---|
| anon | ||||
| authenticated | enabled | enabled | enabled | enabled |
| postgres | enabled | enabled | enabled | enabled |
| service_role | enabled | enabled | enabled | enabled |
You should never expose postgres and service_role roles client-side.
Enqueueing and dequeueing messages#
Once you have created your Queue, you can begin enqueueing and dequeueing Messages.
1import { createClient } from '@supabase/supabase-js'23const supabaseUrl = 'supabaseURL'4const supabaseKey = 'supabaseKey'56const supabase = createClient(supabaseUrl, supabaseKey)78const QueuesTest: React.FC = () => {9 //Add a Message10 const sendToQueue = async () => {11 const result = await supabase.schema('pgmq_public').rpc('send', {12 queue_name: 'foo',13 message: { hello: 'world' },14 sleep_seconds: 30,15 })16 console.log(result)17 }1819 //Dequeue Message20 const popFromQueue = async () => {21 const result = await supabase.schema('pgmq_public').rpc('pop', { queue_name: 'foo' })22 console.log(result)23 }2425 return (26 <div className="p-6">27 <h2 className="text-2xl font-bold mb-4">Queue Test Component</h2>28 <button29 onClick={sendToQueue}30 className="bg-blue-500 text-white px-4 py-2 rounded-sm hover:bg-blue-600 mr-4"31 >32 Add Message33 </button>34 <button35 onClick={popFromQueue}36 className="bg-blue-500 text-white px-4 py-2 rounded-sm hover:bg-blue-600"37 >38 Pop Message39 </button>40 </div>41 )42}4344export default QueuesTest